For the past week, millions of players have had the chance to play Capcom’s remake of Resident Evil 2, a full-fledged reimagining of the 1998 classic from the original PlayStation. The story follows protagonists Leon S. Kennedy and Claire Redfield, as players will be able to play their respective storylines as they each look to escape the terrors of the Racoon City Police Department and surrounding areas, as well as uncover the conspiracy centered around the recent zombie outbreak.
During the game’s final act, both characters will find themselves trenching through the dark hallways of the Umbrella Corp. Underground Facility in search of the G-virus, the chemical solution responsible for the recent outbreak. In order to gain access to the facility’s maximum security lab, players will need to upgrade their security clearance ID wristbands they acquire shortly after entering the area in order to eventually find the virus, and beat one of Resident Evil 2‘s multiple storylines.
In order to upgrade the wristband from level 2 to level 3 security clearance, players will need to find the cooling solution for the facility’s Greenhouse section, which opens a new area where the level 3 upgrade can be acquired. This guide will walk through how to acquire the cooling solution, from finding the initial capsule, to arming it with the solution necessary to clear the pathway for players.
Note: Depending of which walkthrough is being played, the location of key items and combinations to unlock certain areas will vary.
This guide follows the ‘A’ Walkthrough, as Leon.

Players will first need to acquire the Dispersal Cartridge, located in the Greenhouse Control Room. When prompted, a short cutscene will initiate, showing the current state of the canister has no effects on the vegetation, which is referred to as ‘Plant 43’.
Once players have the capsule, make note of the input device to the right of the dispersing mechanism; this will be important throughout the entire section. From here, head into the Greenhouse and examine the escape hatch in the lower-right corner of the room. Examine the hatch and make note of the combination of symbols, then return to the input device in the Control Room and enter the combination to gain access to the basement floor.
Once players have entered the hatch, they should first head towards the room’s dead end and pick up the floor map laying on the table. Turn around and head into the hallway corridor, where there are multiple zombies and lickers waiting. Make sure to grab the trophy placed on the table in the middle of the hallway, kill as many zombies as desired, then head through the door at the other end. Head up the stairs and turn left to find the Signal Modulator in the wall.

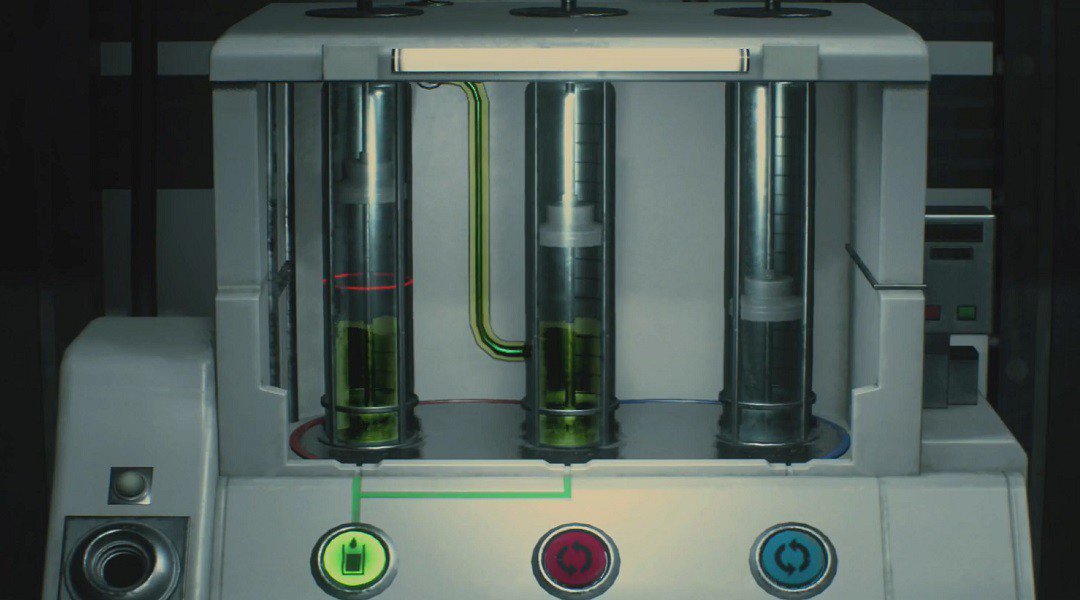
Head through the door in the Storage Room, which brings players back to the save room. Return to the Control Room and examine the trophy, where a different code is located under its base. Enter the new code to unlock the panel in the Drug Testing Lab, which is located in the upper-right area of the Greenhouse. Once players have entered the lab, they’ll need to insert the Dispersal Cartridge to start a puzzle which will, in turn, fill the container up with the required solution.
In order to solve the puzzle, the vial farthest to the left needs to be filled exactly to where the red measurement line is located. For the quickest steps to get there, first fill the left-most vial all the way up to the top by swapping out the middle and right vials and combining the solution as needed. Then, swap the left and middle vials before filling the middle tube to its maximum amount. Once that’s done, move the tubes around so they go in the order of small, medium, and large capacities. Move the fluid in the medium vial to the small one, then continue to move the vial around so the large and small vials are in the left and middle, respectively. Combine the fluids to match the required amount to complete the puzzle.
After solving the puzzle, the Dispersal Cartridge is returned to inventory. Head back down the hatch to the basement level and locate the wall module next to the vending machines, where the Signal Modulator can be inserted. Before inserting it, however, make note of the code shown on the wall – that’s the same signal prompt needed from the Modulator in order to turn the power back on in the basement. Examine the Modulator and switch its frequency in order to make it compatible with the wall module. Inserting the Signal Modulator restores power to the basement level, granting access to the Low-Temp Testing Lab.

Once inside the testing lab, head into the large room in the back where the Dispersal Cartridge can be inserted. Once the lab machine finishes the procedure, the solution is then ready for use. Head all the way back to the Greenhouse Control Room, insert the cartridge, and see the layout of the Greenhouse completely change. Reenter the Greenhouse and earn the Level 3 Security Clearance to the facility.
Resident Evil 2 is filled with numerous puzzles rewarding players with anything from new weapons to even more durable equipment. None of those rewards, however, will prevent players from having to encounter the terrorizing Mr. X, who always seems to be stalking Leon and Claire at every corner they turn. With most of this walkthrough running parallel between both walkthroughs, make sure to use it in order to access the game’s true ending even quicker.
[“source=gamerant”]


