If you have wanted to rename the Uncategorized category in WordPress, then you’re not the first one. Often WordPress beginners ask us if it’s possible to remove or rename the uncategorized category in WordPress. In this article, we will show you how to rename the uncategorized category, and how to change the default category in WordPress.

Contents
What is Default Category in WordPress?
Categories and tags are the two default taxonomies that come with every new WordPress install. By design, your WordPress posts must be filed under at least one category.
If you forget to assign a category to your post, then it is automatically filed under your default category. On a new WordPress install, this default category is titled ‘Uncategorized’.
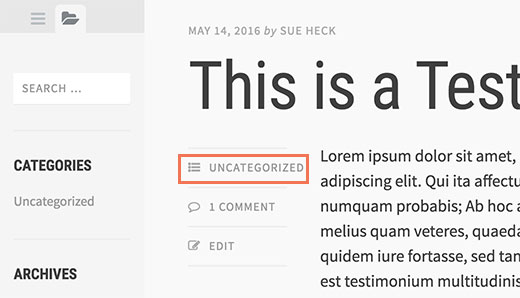
Usually, you can just go to Posts » Categories and delete a category. However, you cannot delete a default category until you assign another category to be used as default.
There are two ways to solve this issue. You can either rename the default category from uncategorized to something more meaningful, or you can set a new default category.
Having said that, let’s see how you can rename uncategorized category or set a new default category.
Renaming Uncategorized Category in WordPress
You cannot delete a default category, but you can rename it. You need to visit Posts » Categories page in the WordPress admin and click on the edit link below the Uncategorized category.
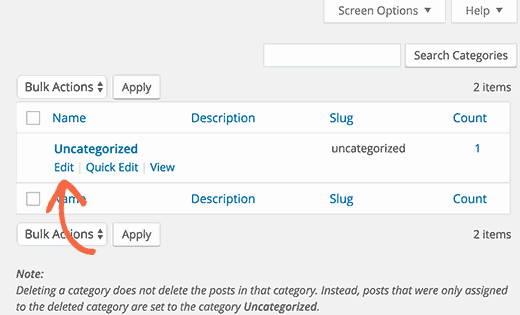
This will bring you to the category edit screen where you can rename your category and change its URL slug.
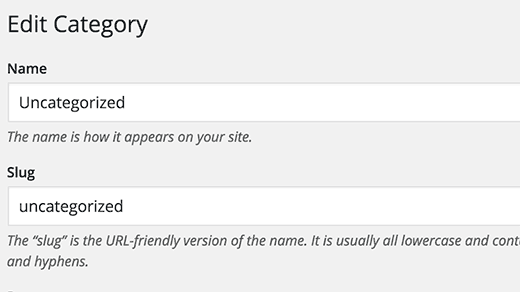
If your site is not live or indexed by search engines, then you can change the URL slug.
However, if your site is live, then changing the URL slug will result into 404 errors when search engines or actual users visit the old URL.
Don’t worry, we will show you how to setup redirects later in this article.
Changing Default Category in WordPress
You can also easily change the default category in WordPress. First make sure you have a category other than uncategorized available.
If you have a category that you would like to use as default, then you can skip this step. Otherwise, go to Posts » Categories and create a new category.

Now visit Settings » Writing page. The first option on the page is to set a default post category.
Click on the drop down menu next to it and select the default category you would like to use.
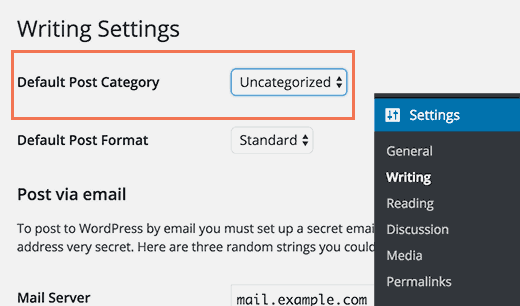
Don’t forget to click on the save changes button to store your settings.
WordPress will now use the category you selected as the default category. If you forget to assign a category to a post, then it will be filed under this default category.
However, posts filed under uncategorized will not be moved to the new category. You can edit those posts and change their category.
If there are just a couple of posts, then you can do it manually. Otherwise, you may want to check out our guide on how to bulk move posts to categories and tags in WordPress.
You can also delete the ‘Uncategorized’ category. If a post was only filed under uncategorized, then it will be automatically moved to your new default category.
Redirecting Old Uncategorized URL
If your site was live when you renamed the uncategorized category slug, or deleted the uncategorized category, then users and search engines will see a 404 page for the old URL.
Here is how you can easily fix that and redirect users to your new category URL or the renamed URL.
First you need to install and activate the Simple 301 Redirects plugin. For more details, see our step by step guide on how to install a WordPress plugin.
Upon activation, you need to visit Settings » 301 Redirects page and enter your old uncategorized url in the Request field and your new URL into the destination field.
[“source=wpbeginner”]


